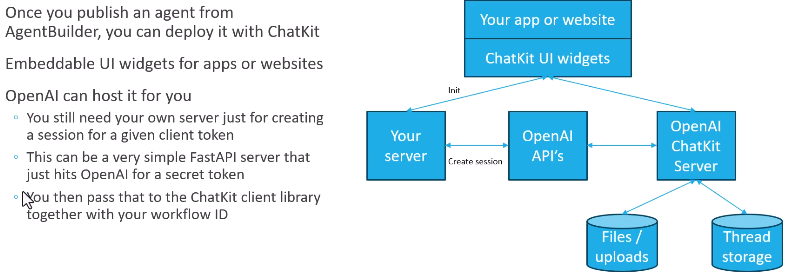
Once you've built an Agent using Agent Builder, you have to deploy it somewhere. That's where ChatKit comes in...
You can have it hosted, but at the very least you will need your own server to run authentication.
Embed ChatKit in your frontend
Build and customize an embeddable chat with ChatKit.
1. Create an agent workflow
Create an agent workflow with Agent Builder. Agent Builder is a visual canvas for designing multi-step agent workflows. You’ll get a workflow ID.
The chat embedded in your frontend will point to the workflow you created as the backend.
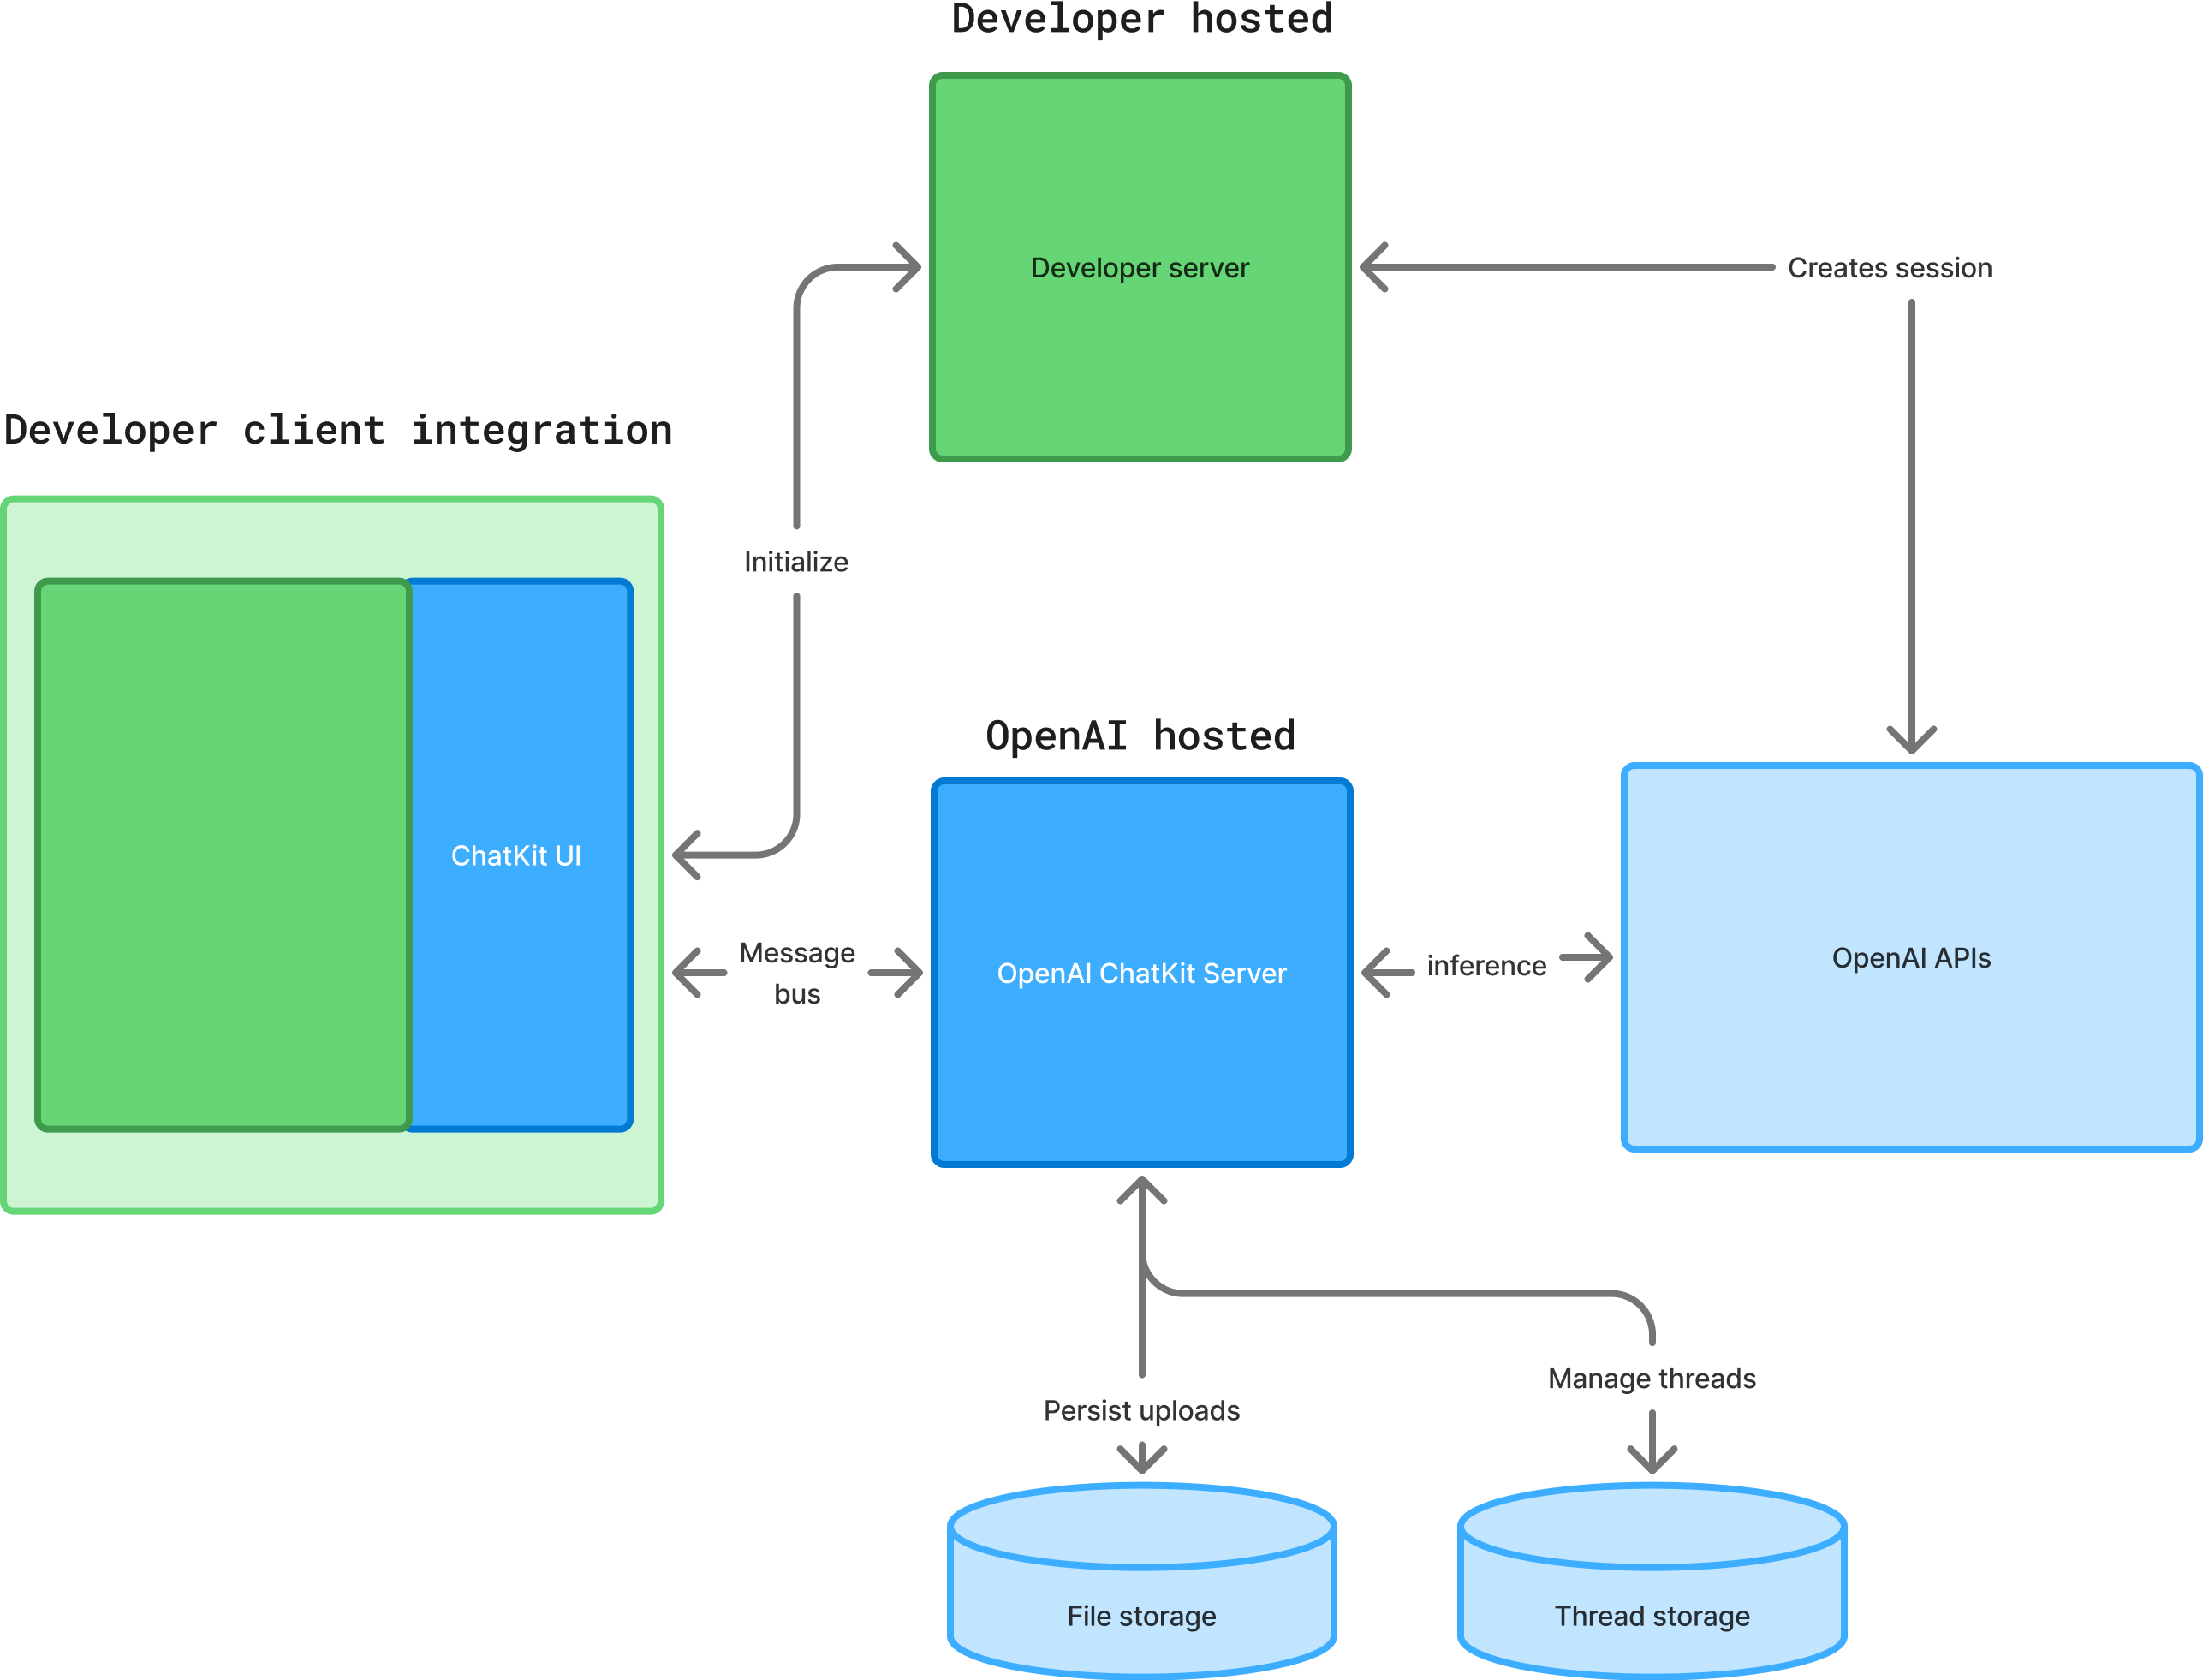
Now if you want to, you can host it all yourself as well. So you don't have to use the OpenAI chat kit server. You can host it on your own hardware if you so desire.
If you want to run on your own infrastructure, there's a chat kit Python SDK you can use to replicate that technology on your own system, your own infrastructure...
2. Build and iterate
See the custom theming, widgets, and actions docs to learn more about how ChatKit works. Or explore the following resources to test your chat, iterate on prompts, and add widgets and tools.
Build your implementation
Explore ChatKit UI
Publish
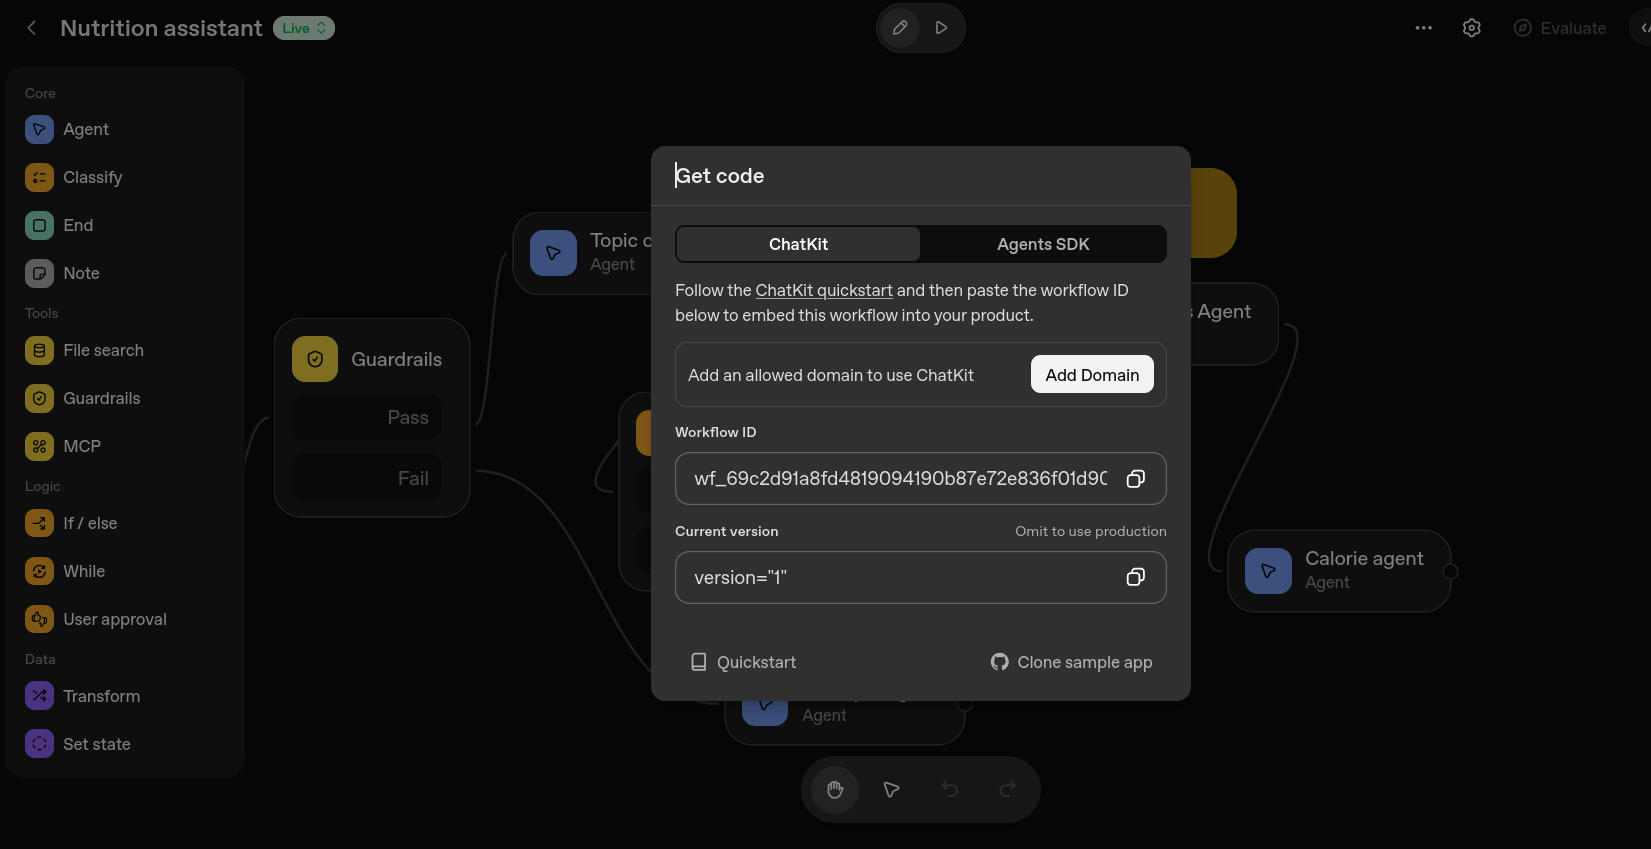
Now there are basically two ways to integrate this workflow.
One is to get the SDK code and use Python as we did before ChatKit.
The other option is to do the automatic integration through chat kit and embed this workflow into your own website.
Find the source on github
https://github.com/arothmel/ai-agents-crash-course
We need the workflow ID
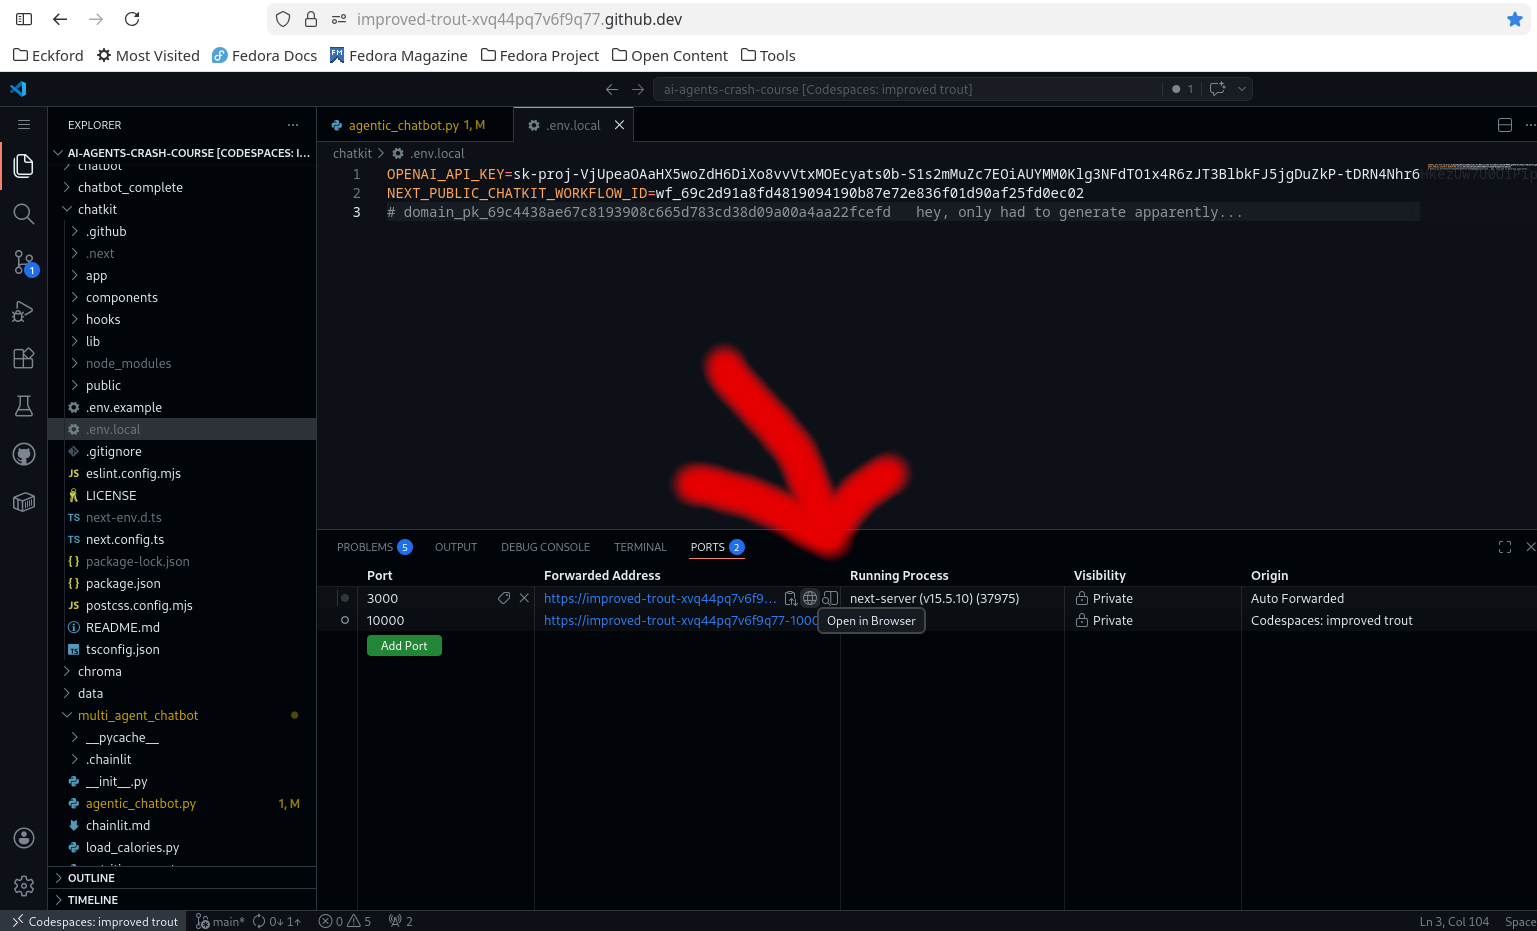
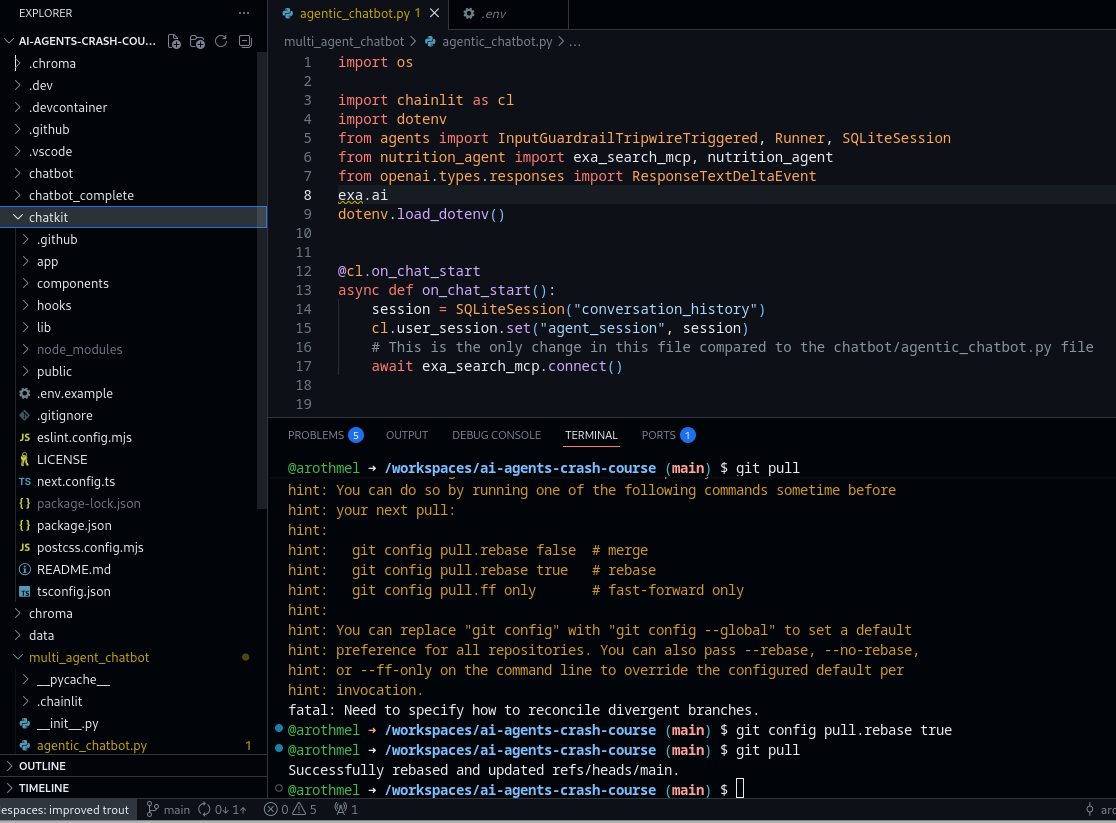
And lets return to the Codespace and pull the source to our codespace memorably titled:
https://improved-trout-xvq44pq7v6f9q77.github.dev/
git pull
Now we have a ChatKit folder, which is basically a copy of OpenAI's OpenAI
ChatKit Starter Template
This repository is the simplest way to bootstrap a ChatKit application. It ships with a minimal Next.js UI, the ChatKit web component, and a ready-to-use session endpoint so you can experiment with OpenAI-hosted workflows built using Agent Builder.
$ cd chatkit
$ cp .env.example .env.local
$ npm run dev
> openai-chatkit-starter-app@0.1.0 dev
> unset OPENAI_API_KEY && next dev
  ▲ Next.js 15.5.10
  - Local:        http://localhost:3000
  - Network:      http://10.0.14.210:3000
  - Environments: .env.local
✓ Starting...
Attention: Next.js now collects completely anonymous telemetry regarding usage.
This information is used to shape Next.js' roadmap and prioritize features.
You can learn more, including how to opt-out if you'd not like to participate in this anonymous program, by visiting the following URL:
https://nextjs.org/telemetry
✓ Ready in 3.3s
Run on own website from git folder. Select the process running on Port 3000